(25-03-23) Blog 84 – Protecting your online activity – Pt4
In this post, I’ll take a look at how you can check to see what issues might be present in your IT setup.
Nessus
Nessus is a professional vulnerability scanner made by a company called Tenable which allows you to scan the devices in your network and look for potential issues.
Whilst the product is designed for businesses, their is a version which you can download and run on your home network which is 100% free to run. That product is Nessus essentials.
Nessus essentials is the same version as the fully paid-for version except that there a few capabilities which are locked out. For home users this will not be an issue – the basic network scan available in Nessus essentials is all you will need to run.
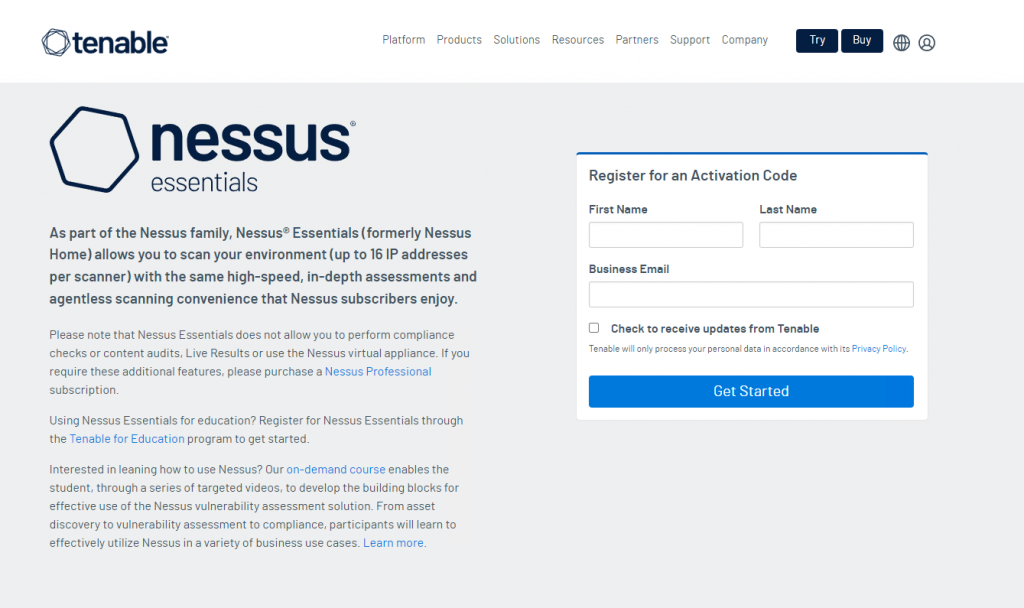
When downloading Nessus essentials, you will need to register an account – this is so that Tenable can allocate you an access code to use the product.
Installing Nessus
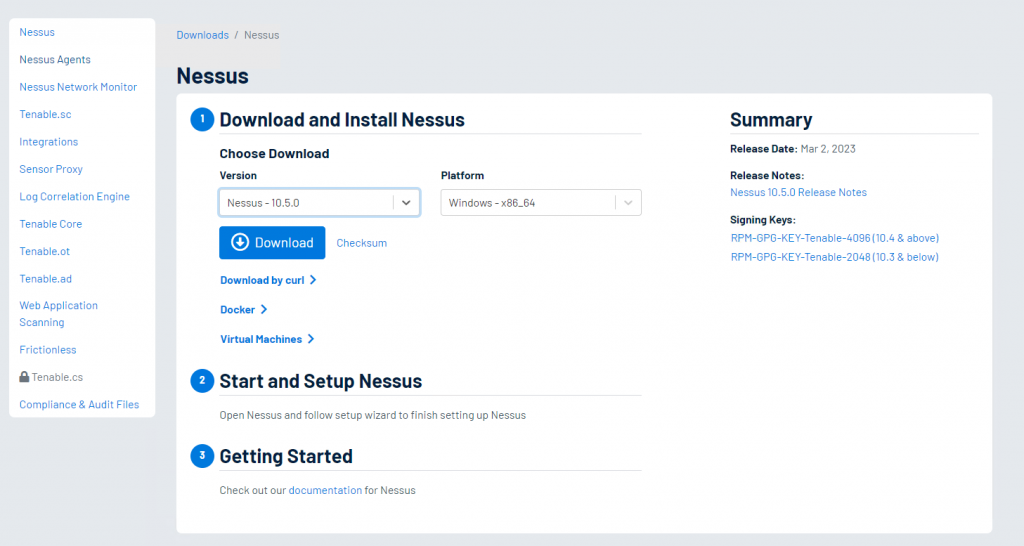
Once you have provided details for your activation code, you will be able to access the download page for Nessus.
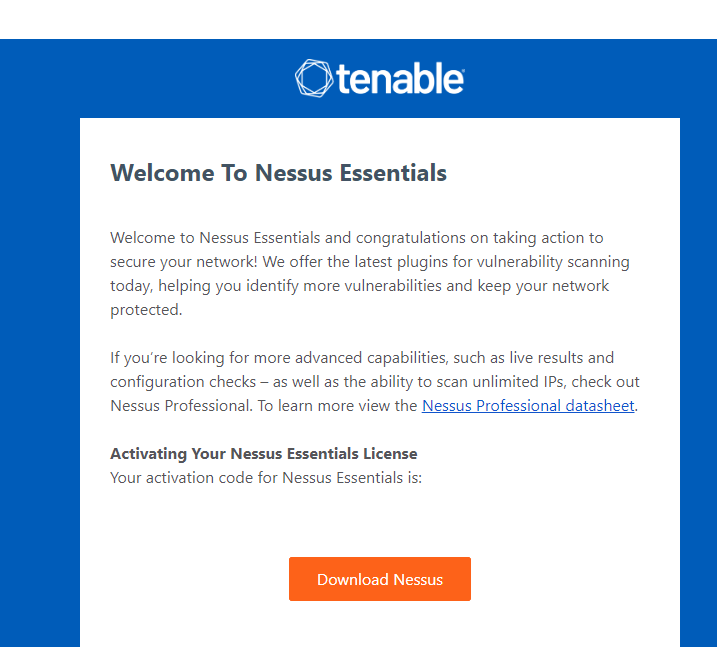
Your activation code will be emailed to the address you provide:
Choose the version which is appropriate for your device and then download the installer package
Once the installer has downloaded, double-click it to run it and then follow the instructions in the installer wizard. The installation process should only take a minute or two.
Post installation activities
During the installation process, Nessus creates a web service which runs on port 8834 of your installation device. Once the installation has completed, a browser will open with a Welcome page.
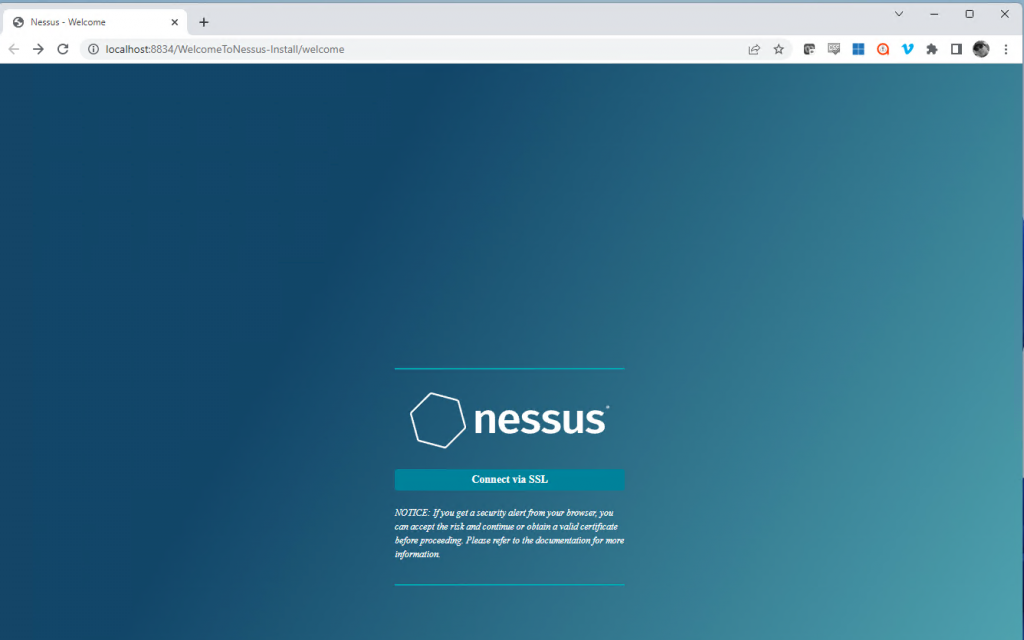
Click the option to connect with SSL – When you click this link, your browser will attempt to connect to the webserver using encryption – at this point you will not have a valid digital certificate for the webserver, so your browser will inform you that the connection is not secure and you should be cautious – This is a standard browser message – it’s fine to proceed to the site.
Register your installation
When you connect to the Nessus instance, you will need to register your installation – to do this you will need your activation code. Enter the code on the registration page.
Once the product is registered, you will be prompted to create a user account. Once this has been completed, you will now be able to log-in to Nessus.
Creating a scan
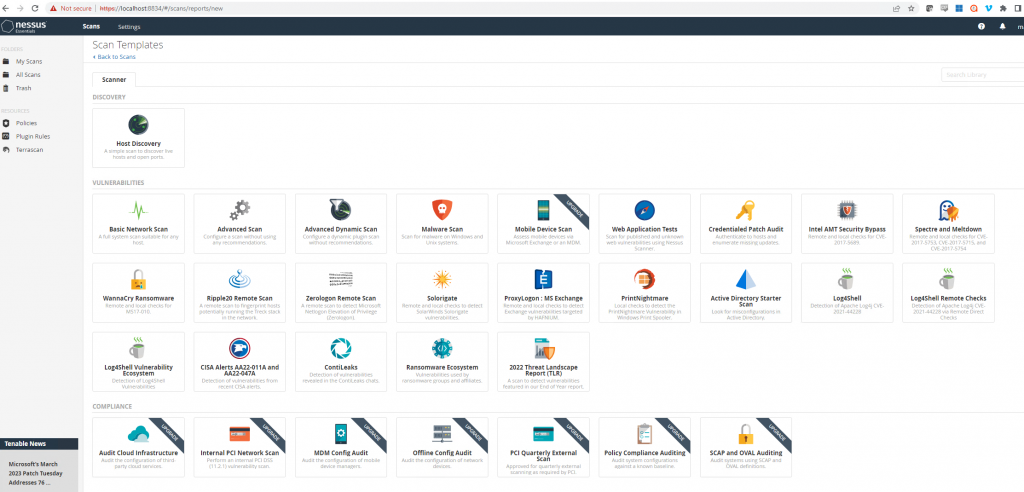
When you use Nessus for the first time, you would be best advised to use the inbuilt scan templates, of which Nessus Essentials has quite a few.
For most home users, the Basic Network Scan will be sufficient.
When you select the basic network scan, you will be presented with a page whare you can start to configure the scan:
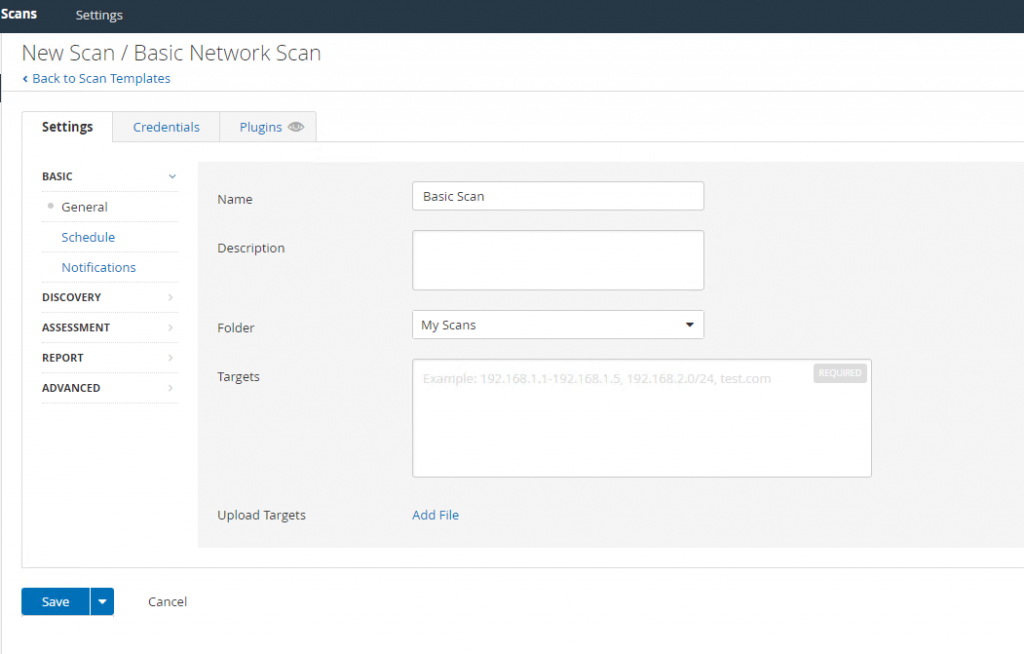
In the Targets field, you will need to specify the IP address(es) of the device(s) you want to scan.
If you know the IP addresses of the devices you want to scan, simply enter them in the box.
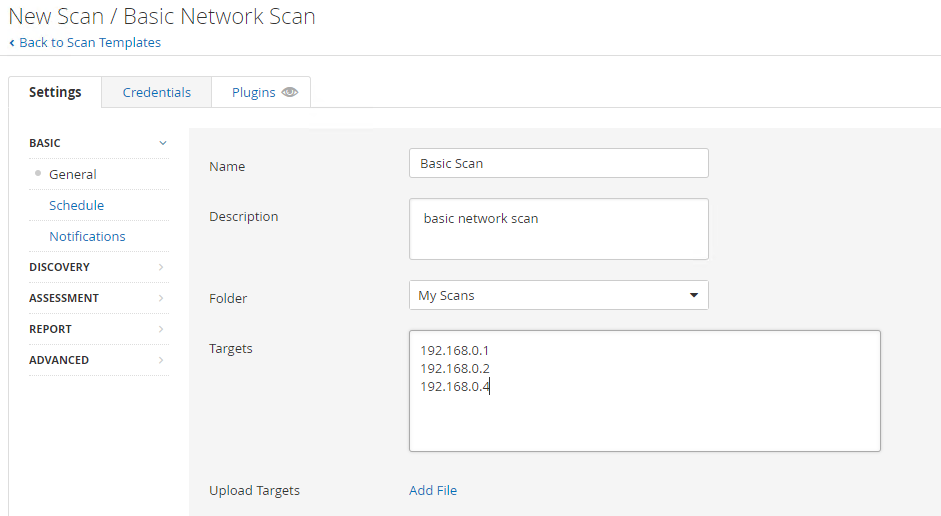
If you aren’t sure, then you can enter your entire network IP range in CIDR notation.
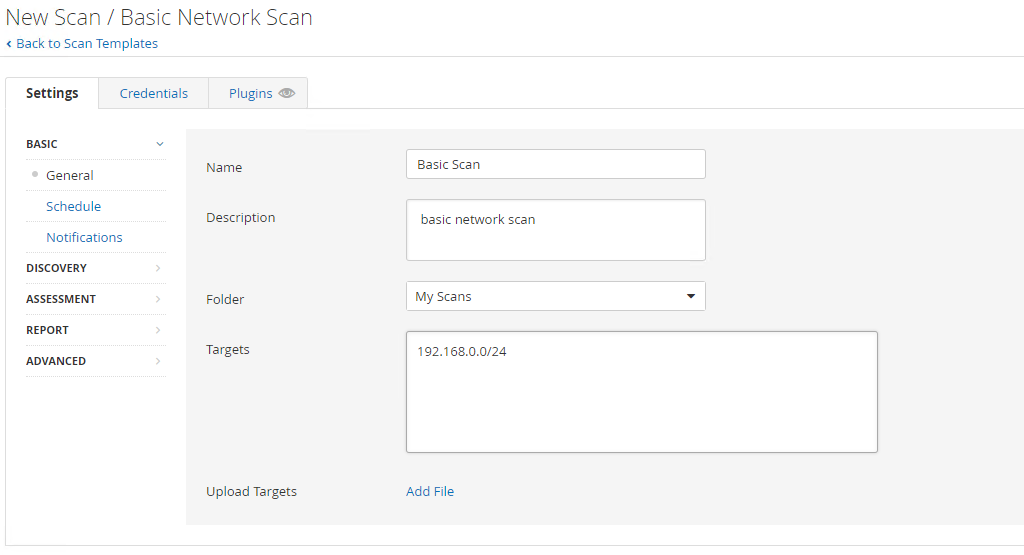
Note: Nessus Essentials only allows you to see results for 16 devices, which should be enough for most home users. If you are like me however and have many more devices in your network, you might be best placed to make multiple scan profiles with 16 IP addresses per scan.
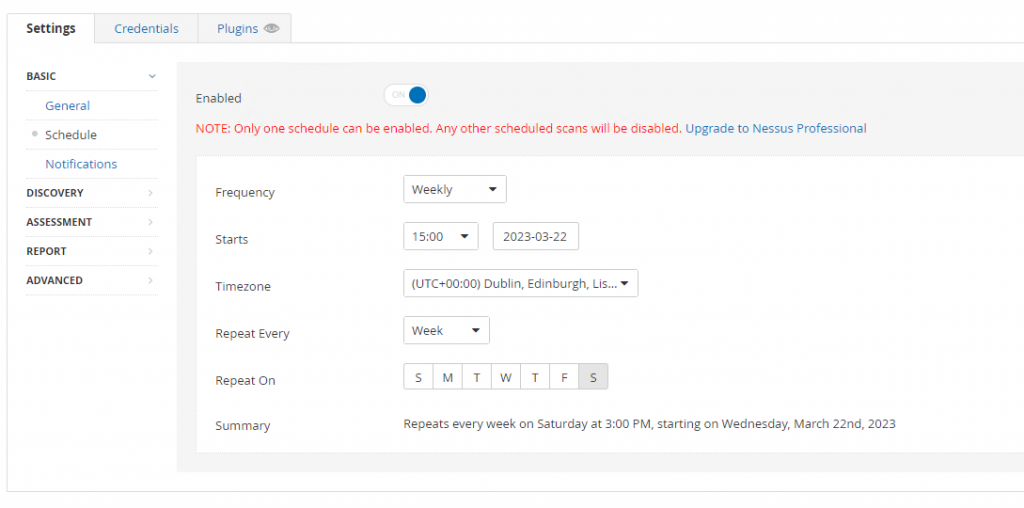
Creating a schedule
You can run any Nessus scan manually at any time, however it’s best to set a schedule so that you don’t forget to run your scan.
To create a schedule, click the enable button and then define the frequency and start-time for the scan.
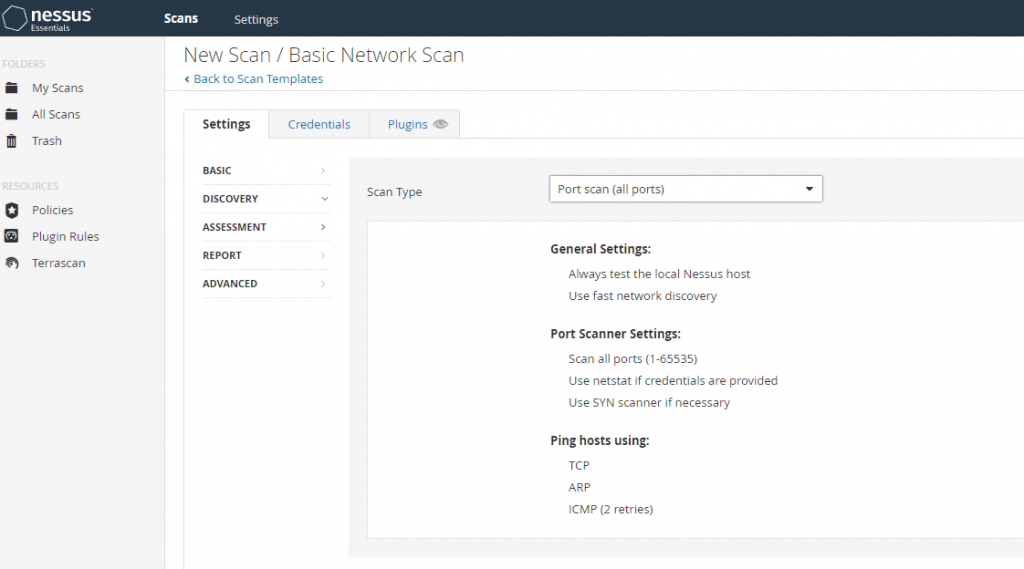
Discovery settings
Once you have completed the basic setting s for your scan, you should select the Discovery option and choose what type of scan Nessus will conduct on any discovered devices.
In most cases, the default scan of the common ports will be enough, however it is advised that at least once, you perform an all ports scan to ensure that you have no open ports which a common ports scan would miss.
Once these scan settings have been completed, you can leave the rest of the options at their default option and save the scan configuration.
Running the scan
Whether you have set your scan to be run via a schedule, or manually, it is wise to run the scan straight away to check that you have configured everything correctly.
On the My Scans page, locate the scan you want to run and click the play button on the right-hand side of the scan line.

You can check on the progress of a running scan by clicking the scan, but it is best to wait until the scan has completed before analysing any results.
Viewing results
Nessus displays the scan results via an interactive dashboard.
There are three tabs at the top of the dashboard:
- Hosts
- Vulnerabilities
- History
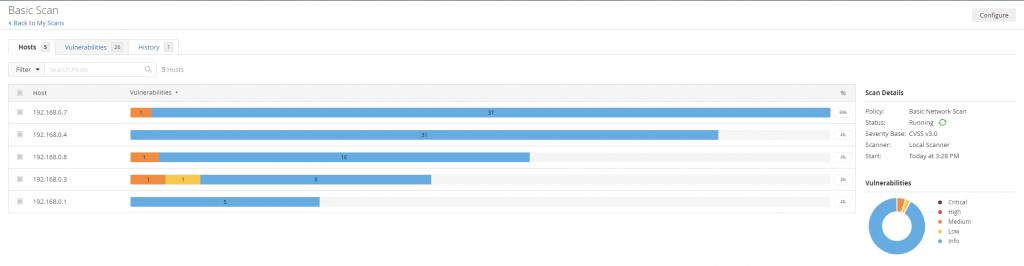
When viewing the hosts page, you will see a list of IP addresses – these are the devices Nessus has scanned – and coloured bars alongside each one.
The colours in the bars identify any discovered vulnerabilities – There is a key shown which details what each colour represents.
To see information relating to the discovered vulnerabilities, you can either click the vulnerabilities tab, or click the line next to the device you wish to explore.
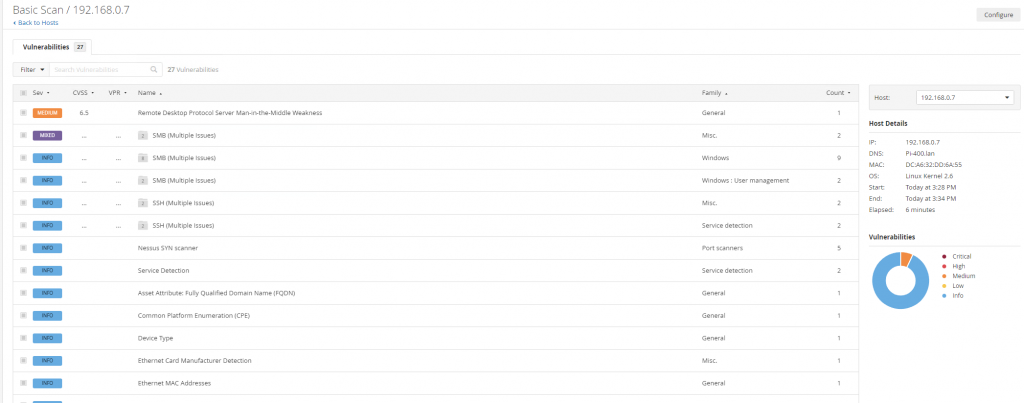
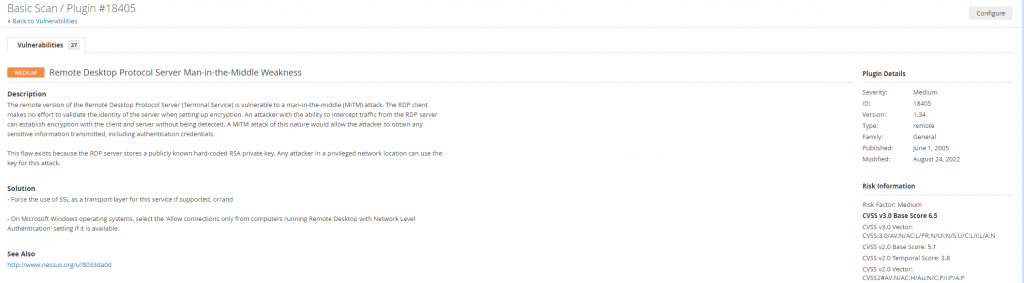
To see detailed information relating to a specific vulnerability, click the line which represents the vulnerability you wish to explore.
Interpreting the results
At first glance, it may seem that you have a whole host of issues to try to deal with, but you should always look at the results in context.
For example, take the vulnerability above. This is a vulnerability, which for a home user wouldn’t really be too much of an issue – It’s highly unlikely that you would be at risk of a man-in-the-middle attack in your own home network.
If the same device, with the same vulnerability were to be in a corporate network however, then the risk would be greater and steps should be taken to mitigate the probability of the attack happening by either conducting an update of the device in question, or by adding security in another manner.
That being said, if you don’t use remote desktop in your windows network, and Nessus discovers it, then you would need to look at how to disable the service so that the vulnerability is removed.
Conclusion
You should run scans of your network at regular intervals to ensure you have a good view on any issues. If you are not aware of the issues, then you will not be able to fix them.
Nessus Essentials is completely free, takes minutes to setup and run and will give you piece of mind that you are doing the best you can to ensure your home network is as secure as it can be.