(05-01-23) Blog 5 – Pi-hole, post install activities
This is the 2nd in my mini series on the wonderful thing that is a pi-hole.
If you are fortunate enough to have a raspberry pi, you might now have completed the installation of the pi-hole software. If not, then keep on reading as you’ll become more aware of what the pi-hole can do for you.
If you have followed the instructions on pi-hole.net to install the pi-hole software, you will know that one of the important things to do with your pi-hole is give it a static IP address.
This is required so that all your devices know where to send their DNS query requests. If the pi-hole IP address changes, then your devices will not know where to send their queries, and as such it will appear to those devices that there is no Internet access.
In my network, I gave my pi-hole the IP address of 192.168.0.3 – My router uses 192.168.0.1, and I wanted some room for future network expansion, so I left 192.168.0.2 empty.
In order for your devices to start sending their DNS data to your pi-hole, you need to configure their network settings. This can be done in a couple of ways which I will outline in this blog, but before I do that I feel it important for those who are new to this sort of stuff to have a bit of background in how IP addresses are allocated to devices.
So here’e a little DHCP primer…
DHCP – the Dynamic Host Configuration Protocol
In the early days of networking, there were few devices which required access to the network, so it was fairly easy to manage the network configuration, and was usually achieved by manually entering the network config data to each machine.
As networks grew in size, the manual approach was deemed to be too cumbersome, and as such an automated approach was sought.
A couple of techniques were developed over the years – RARP, and BOOTP, but neither offered a satisfactory complete solution to large-scale IP management.
This is where DHCP comes in – defined as a technology in 1993, DHCP has become the global standard for automatic IP address management.
How DHCP works
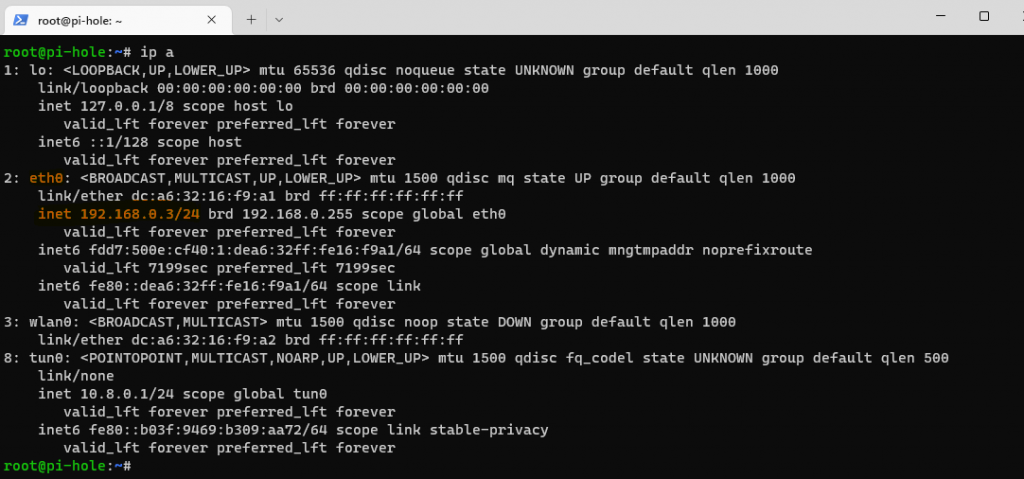
When a device which is configured to use DHCP is started, or joins a network, it initially has no IP address for use in that network, so it sends out a broadcast over the network to see if there is an available DHCP service. This is known as the DHCP Discover message
In most home networks, the DHCP service runs on the home router. In larger networks, the DHCP service typically runs on a dedicated server.
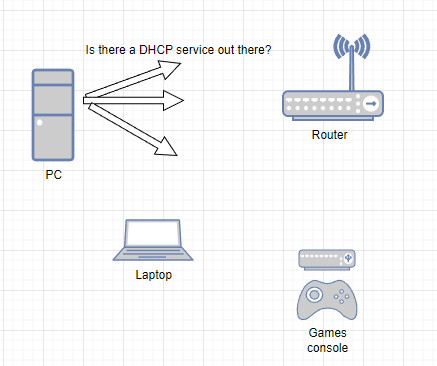
When the DHCP discover message is received by a DHCP service, it checks to see if it has any available IP addresses to give out, and if so, responds with some DHCP configuration data in a message known as the DHCP Offer message.
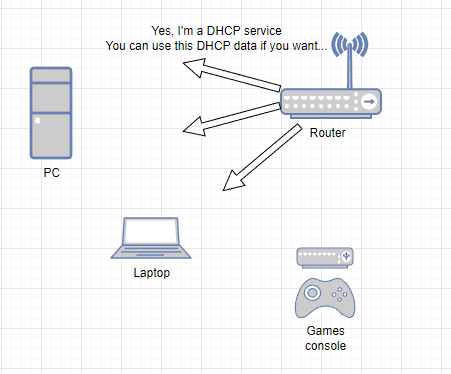
The requesting device receives the DHCP offer and decides to accept it, so sends back to the server and DHCP Request message, which is used to request a lease for the data offered.
The DHCP service now makes a note that the offered IP data has now been leased by the device, so that it doesn’t offer the same data to another device and completes the conversation with a final DHCP Acknowledge message.
In networking, this DHCP handshake is known as the DORA process (Discover, Offer, Request, Acknowledge)

Configuring DHCP with pi-hole data
OK, so you know how DHCP works, so what do you need to do with it to make your devices use your pi-hole?
Well it all depends on your router…
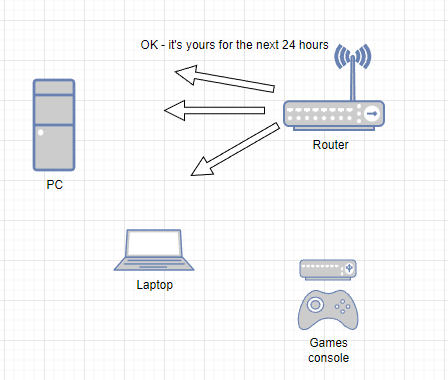
In most home networks, the DCHP service runs on their home router, so in order for your devices to use your pi-hole, you need to make some small setting changes on the router – If the router allows it that is!
On the router, there might be an option for you to see what IP address the DHCP service offers for DNS queries – This address will most likely be one managed by your ISP, but in order that your devices use your pi-hole this needs to be altered to point to your pi-hole, not your ISP.
I use Virgin Media as my ISP, and as such they provide me with my router, but unfortunately, Virgin media don’t have an option which lets me see the DNS IP address, let alone change it.
So in my situation, I have had to disable the DHCP option on the router and use something else instead – my pi-hole!
Yes, your pi-hole can also be a DHCP server.
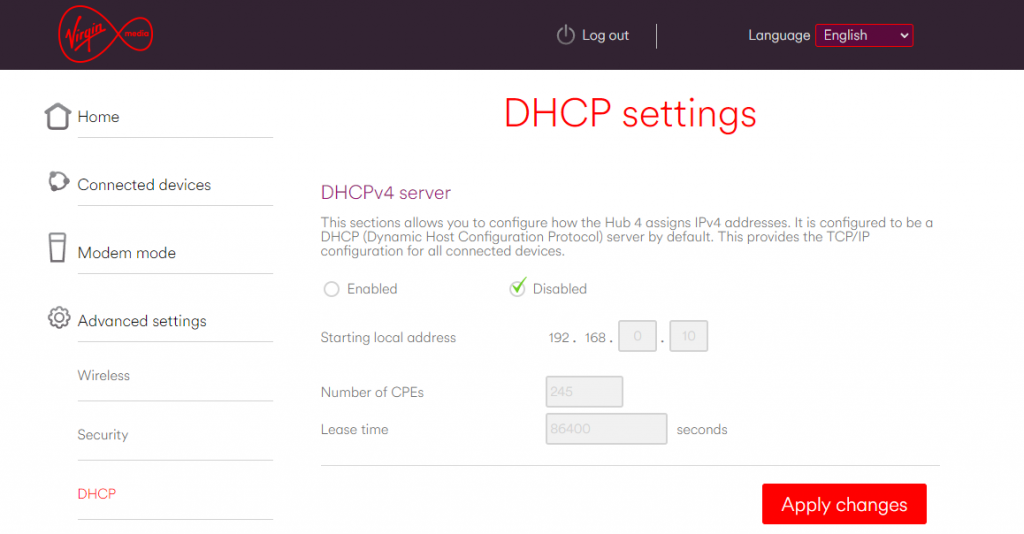
To check to see if you can edit your router DHCP settings, open a browser and enter the IP address of your router. You should recieve a webpage requiring you to login to the admin panel of the router.
Once you have logged in to the router, look for the DHCP option. If there is an option to alter the DNS setting in DHCP, use it to enter the IP address of your pi-hole. If there is no option, you will have to disable the DHCP service on the router.
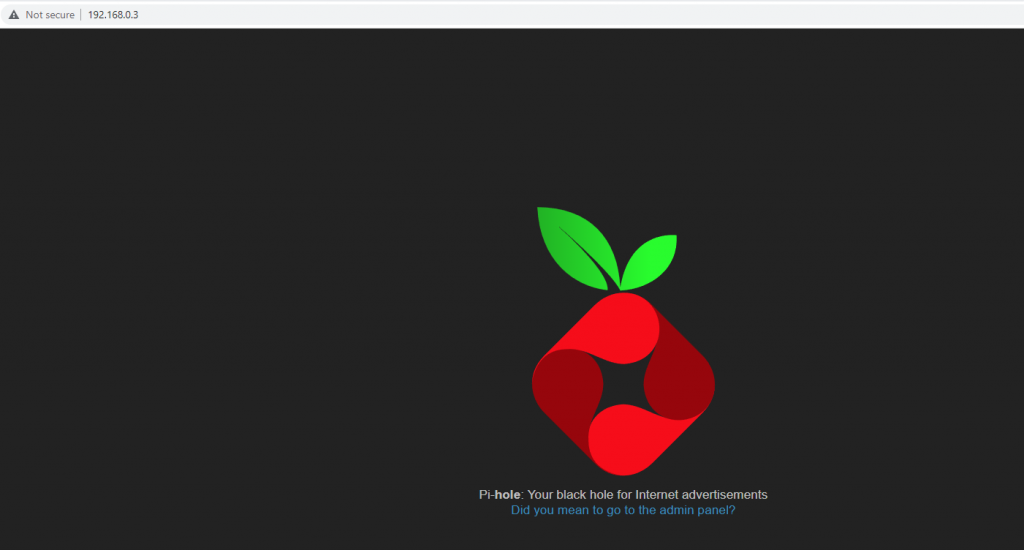
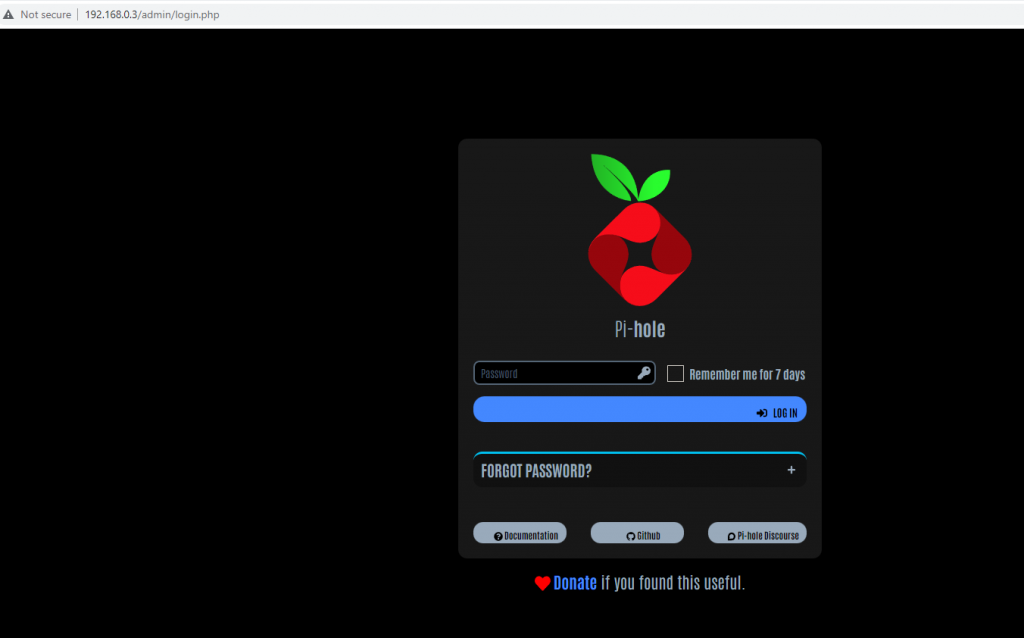
To enable the DHCP option on your pihole, enter the IP address of your pihole in a browser and you will be taken to the webpage for your pihole where you can login to the admin dashboard.
You might see a screen that asks you if you meant to go to the admin page – click the blue text to redirect to the correct page to login,
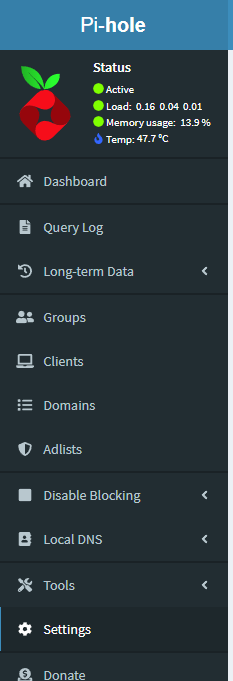
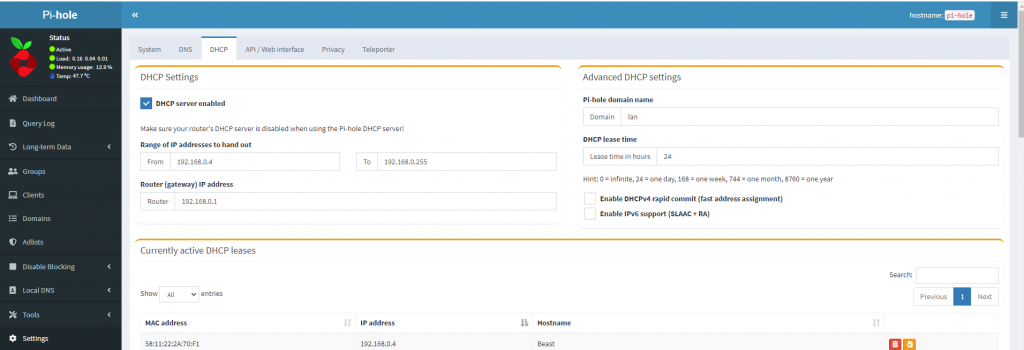
Once you log in, head to the Settings option on the main navigation menu which is on the left of the dashboard, then click the DHCP option from the menu at the top of the screen.
You need to enable the DHCP service and then specify the IP address range to use:
In the From box, enter an IP address which starts after the IP addresses already in use by your router and your pi-hole itself. For most people this would most likely be 192.168.0.3. In my case, my pi-hole uses 192.168.0.3, so my start IP address is 192.168.0.4
In the To box, enter the highest IP address you wish to hand out to devices – most people would choose the value 192.168.0.255 as this is the greatest number you can have for this type of IP address. This will give you over 250 IP addresses which should be more than enough for most people’s home networks.
Enter the IP address of your router in the appropriate box – most likely 192.168.0.1
If you want to give your network a name you can enter a value in the pi-hole domain name box, but this is not necessary.
For the DHCP lease time, you can enter almost any value, but it’s probably best to leave it at the default of 24 hours.
You must click the Save button for the changes to take effect.
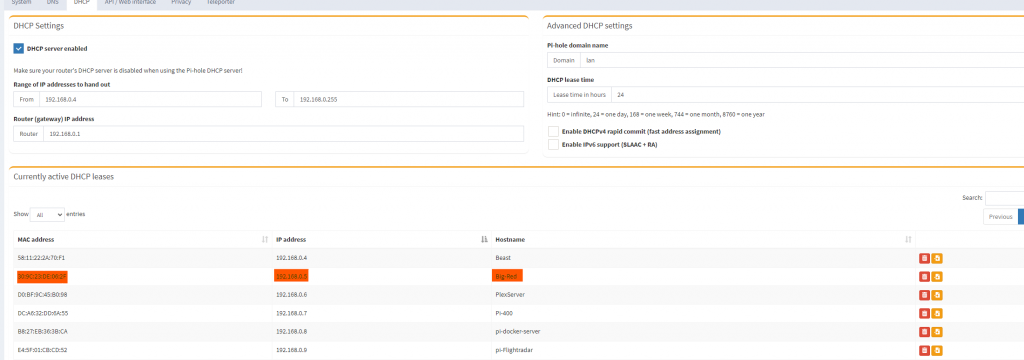
Once you have made your DHCP changes, use one of your devices to check if the settings you specified are being used.
If you are on a Windows PC , reboot the device and once it is back online, use the CMD prompt with the command ipconfig /all to see what settings it has received.

If you log back in to the pi-hole dashboard, and return to the DHCP settings page, you should now see the data under the Currently active DHCP leases.
In the image below, the highlighted data is the same as that seen in the screenshot above.
You now have the lovely job of re-booting all your devices in your network so that they start using your pi-hole!
In the next blog, I will explain how to add block lists to your pihole to banish those nasty adverts